twitter
    Find out what I'm doing, Follow Me :)

Wednesday, July 27, 2011

Computer tips to bring computer to normal state when it freezes or hangs up

Sometimes when you are in the middle of someting and suddenly your computer hangs or freezes. You are left with no other option than to restart your computer directly. But the only problem is, you have not saved your work! Don’t panic! There is a solution for that! And you can surely save your file! Here’s how:
First keep on pressing “Num Lock” key until your Operating system is back to normal state. This releases the processor from any busy process. If this doesn’t work then follow the below ten tips to bring you computer back to normal state when it is struck.

1. Click on “ctrl-alt-delete” keys. The windows task manager will then open, click on all programs that you don’t need and end the task. You will see that all programs on your taskbar will close one by one. If this will resolve the issue! – then save!

(Tip 1: if you’re working on an MS Office application, it will automatically save your file in case the programs suddenly shut down —

Tip 2: always save your file at least every 2 minutes by just simply clicking on the “diskette icon”— its just one click!)

2. If it did not resolve the issue, are there some users logged on that computer? If so, go to switch user (for XP) and log off that user, go back to your log on screen and log on again. The reason the computer hang up is because if there are many open programs and applications, these retains in the memory, if it is too much for the memory to handle, it freezes! Another reason too the computer hang up is because if you are connected to the internet via dial up, and you are running too many applications and opening many websites. So I suggest, if you are multimedia user or a heavy internet user, then you are better off with a higher memory, at least 512Mb of memory. There are simple ways to avoid computer to freeze or hang up:

3. Clean your history at least once a week >tools>internet options>clear history. I normally set my history to “0”, meaning, when I restart my computer, it doesn’t save history pages that I have visited

4. Delete all internet temporary files >tools>internet options>delete files (do the “offline” content too!)

5. Delete cookies (some do not do this, but I do delete cookies at least once a week!) >tools>internet options>delete cookies
6. Remove unnecessary programs that you no longer use they are just occupying space and memory! >control panel>add/remove programs

7. Do defragmentation at least once a week >point the mouse to “start” button, then right click “explore”>right click the mouse pointing to drive C (which is usually the main system logical drive) >properties>tools>defragment now

8. You can also check the logical drive’s volume for errors >point the mouse to “start” button, then right click “explore”>right click the mouse pointing to drive C (I repeat, is usually the main system logical drive) >properties>tools>check now

9. It is better to have only one user being logged on. Even if there are many users, make sure the user logs off after using the computer, rather than keeping it logged on and you do the switching of users. Switching users is good as long as you don’t keep all users logged on—I think that is more logical

10. Always shut down properly the computer (do NOT use the power button when turning it off!

Tuesday, July 26, 2011

How to Create your own Run Command ?

I talk a lot about Windows, and using the “Run” command is a large part of it. It is a simple and easy method of accessing programs quickly. If you happen to want to make a shortcut to an application your own way, guess what, you can!

Let’s do it:

Step 1: Go to “Start,” “Run,” (told you we use it a lot) and type regedit.

Step 2: Navigate to the following:
HKEY_LOCAL_MACHINE\SOFTWARE\Microsoft\Windows\CurrentVersion\Apps Path

Step 3: Create a new folder/key under Apps Path. (Right-Click Apps Path and click “New,” “Key.”)

Step 4: Title the new folder/key the name of the application, e.g. firefox.exe.

Step 5: Right-Click the default string value (the thing automatically created in your new folder) and click Modify.

Step 6: Change the value to the path of the executable you are attempting to run. E.g. C:\Program Files\Mozilla Firefox\firefox.exe.

Step 7: Create a new “String Value” by right-clicking under the default value (the thing we just edited) and select “New,” “String Value.” Name it Path and enter the value as the same path you previously entered.


Step 8: Done! Now, all you need to do is go to “Start,” “Run,” and type the name of your command!

Monday, July 25, 2011

Forgotten Ubuntu Password – Reset within minutes

Forgotten Ubuntu Password – Reset within minutes

If you’ve ever forgotten your password, you aren’t alone… it’s probably one of the most common tech support problems I’ve encountered over the years. Luckily if you are using Ubuntu they made it incredibly easy to reset your password.

All it takes is adjusting the boot parameters slightly and typing a command or two, but we’ll walk you through it.

Reset Your Ubuntu Password

Reboot your computer, and then as soon as you see the GRUB Loading screen, make sure to hit the ESC key so that you can get to the menu.

Root Shell – Easy Method

If you have the option, you can choose the “recovery mode” item on the menu, usually found right below your default kernel option.

Then choose “Drop to root shell prompt” from this menu.

This should give you a root shell prompt.

Alternate Root Shell Method

If you don’t have the recovery mode option, this is the alternate way to manually edit the grub options to allow for a root shell.

First you’ll want to make sure to choose the regular boot kernel that you use (typically just the default one), and then use the “e” key to choose to edit that boot option.

Now just hit the down arrow key over to the “kernel” option, and then use the “e” key to switch to edit mode for the kernel option.

You’ll first be presented with a screen where you can find this written “ro single”

You’ll want to remove the “ro single” part with the backspace key, and then add this onto the end:

rw init=/bin/bash

Once you hit enter after adjusting the kernel line, you’ll need to use the B key to choose to boot with that option.

At this point the system should boot up very quickly to a command prompt.

Changing the Actual Password

You can use the following command to reset your password:

passwd

After changing your password, use the following commands to reboot your system. (The sync command makes sure to write out data to the disk before rebooting)

sync
reboot –f

I found that the –f parameter was necessary to get the reboot command to work for some reason. You could always hardware reset instead, but make sure to use the sync command first.
And now you should be able to login without any issues.

How Safe is Your Computers ?

pc-security.jpg

Security Facts about an average computer user

  • 70% users Install a lot of softwares or games which he finds interesting.
  • 80%of the user are not ready to update their system with latest patches.
  • 60% of the user don’t know if there system is secure.
  • 70% user don’t know how to find if the system is really secure


So how do you find if your system is secure and patched with latest patches and updates. Security System Analyzer (SSA) is a tool designed to check your system for the latest security updates. This tool can scan your system and find out the vulnerabilities about the missing patches and updates and provide you a link from where to get.

Features of SSA

  1. Finds security vulnerabilities and the missing patches for windows.
  2. Gives a direct link to possible patches to be used to remove the security hole.
  3. Supports Windows 2000, XP, Vista.
  4. One click to get the information about latest security vulnerabilities and others.
  5. Generates HTML reports which makes view easy and can be exported.

Open Vulnerability and Assessment Language (OVAL) is an international, information security, community standard to promote open and publicly available security content, and to standardize the transfer of this information across the entire spectrum of security tools and services. OVAL includes a language used to encode system details, and an assortment of content repositories held throughout the community.

ssa-startup.png

How SSA works?

This software completes the whole process in 3 steps:

  1. Representing configuration information of systems for testing;
  2. Analyzing the system for the presence of the specified machine state (vulnerability, configuration, patch state, etc.)
  3. Reporting the results of this assessment

ssa-update.png

Resources

How to Change IP in a ONE Minutes.....

This article will help you to change your IP address within a minute. Just follow the following step and you will be thru.

1. Click on "Start" in the bottom left hand corner of screen
2. Click on "Run"
3. Type in "command" and hit ok

You should now be at an MSDOS prompt screen.

4. Type "ipconfig /release" just like that, and hit "enter"
5. Type "exit" and leave the prompt
6. Right-click on "Network Places" or "My Network Places" on your desktop.
7. Click on "properties"

You should now be on a screen with something titled "Local Area Connection", or something close to that, and, if you have a network hooked up, all of your other networks.

8. Right click on "Local Area Connection" and click "properties"
9. Double-click on the "Internet Protocol (TCP/IP)" from the list under the "General" tab
10. Click on "Use the following IP address" under the "General" tab
11. Create an IP address (It doesn't matter what it is. I just type 1 and 2 until i fill the area up).
12. Press "Tab" and it should automatically fill in the "Subnet Mask" section with default numbers.
13. Hit the "Ok" button here
14. Hit the "Ok" button again

You should now be back to the "Local Area Connection" screen.

15. Right-click back on "Local Area Connection" and go to properties again.
16. Go back to the "TCP/IP" settings
17. This time, select "Obtain an IP address automatically"
tongue.gif 18. Hit "Ok"
19. Hit "Ok" again
20. You now have a new IP address

With a little practice, you can easily get this process down to 15 seconds.

P.S:
This only changes your dynamic IP address, not your ISP/IP address. If you plan on hacking a website with this trick be extremely careful, because if they try a little, they can trace it back

Thursday, July 21, 2011

Disable XP's splash screen

The Windows XP splash screen is designed to hide all of the behind the scenes boot information that is ordinarily never needed to view. However, if you need to troubleshoot a startup problem, it may be necessary to view this information to determine the trouble. To find out, you can disable the splash screen by making a small change to the Boot.ini file. Follow the steps below:
  1. Press [Windows][Break] to open the System Properties dialog box.
  2. On the Advanced tab, click the Settings button in the Startup And Recovery section.
  3. In the Startup And Recovery dialog box, select the Edit button in the System Startup section.
  4. The Boot.ini file will open in Notepad; locate the line that ends with the /fastdetect switch.
  5. Position your cursor right after the parameter, press the spacebar, and add the /SOS switch.
  6. Save the Boot.ini file, and close Notepad.
  7. Click Cancel to close both the Startup And Recovery dialog box and the System Properties dialog box.
  8. Restart the system.
When the system restarts, the splash screen will no longer appear. You can observe some of the operations that Windows XP performs during the startup stage.
To revive the splash screen, simply repeat the above steps to edit the Boot.ini file and remove the /SOS switch.

Speed Increase Your Cable Modem or DSL in XP

This tweak is for broad band cable connections on stand alone machines with WinXP
professional version - might work on Home version also. It may also work with networked
machines as well.
This tweak assumes that you have let WinXP create a connection on install for your
cable modem/NIC combination and that your connection has tcp/ip - QoS - file and print
sharing - and client for Microsoft networks , only, installed. It also assumes that
WinXP will detect your NIC and has in-box drivers for it. If it doesn't do not try
this.
· In the "My Network Places" properties (right-click on the desktop icon and choose
properties), highlight the connection
then at the menu bar choose "Advanced" then "Advanced Settings". Uncheck the two
boxes in the lower half for the
bindings for File and Printer sharing and Client for MS networks. Click OK.
· From the Windows XP CD in the support directory from the support cab, extract the
file netcap.exe and place it in a
directory on your hard drive or even in the root of your C:\ drive.
· Next, open up a command prompt window and change directories to where you put
netcap.exe. then type "netcap/?".
It will list some commands that are available for netcap and a netmon driver will be
installed. At the bottom you will
see your adapters. You should see two of them if using a 3Com card. One will be for
LAN and the other will be for
WAN something or other.
· Next type "netcap/Remove". This will remove the netmon driver.
· Open up Control Panel->System->Dev Man and look at your network adapters. You
should now see two of them and one will have a yellow ! on it. Right-click on the one
without the yellow ! and choose uninstall. YES! You are uninstalling your network
adapter, continue with the uninstall. Do not restart yet.
· Check your connection properties to make sure that no connection exists. If you get
a wizard just cancel out of it.
Now re-start the machine.
· After re-start go to your connection properties again and you should have a new
connection called "Local area connection 2". Highlight the connection, then at the menu
bar choose "Advanced" then "Advanced Settings". Uncheck the two boxes in the lower half
for the bindings for File and Printer sharing and Client for MS networks. Click OK.
· Choose connection properties and uncheck the "QOS" box.
· Re-start the machine.
After restart enjoy the increased responsiveness of IE, faster page loading, and a
connection speed boost.
Why it works, it seems that windows XP, in its zeal to make sure every base is covered
installs two separate versions of the NIC card. One you do not normally see in any
properties. Remember the "netcap/?" command above showing two different adapters? The LAN
one is the one you see. The invisible one loads everything down and its like your running
two separate cards together, sharing a connection among two cards, this method breaks
this "bond" and allows the NIC to run un-hindered.

Slow Boot When NETWORKING......Solutions......

On some XP Pro installations, when connected to a network (peer-peer in this case),
the computer boot time is over 1:40. The system seems to freeze after logging in and the
desktop may not appear or will freeze for a minute. As timed with the utility,
Bootvis.exe, the problem was with the driver mrxsmb.dll, adding over 67 seconds to the
boot time. Turning off and restoring file and printer sharing eliminated 65 seconds from
the boot time.
· Alt-click (or right-click) on Network Places > Properties.
· Alt-click on Ethernet Adapter connection > Properties.
· Un-check "File and Printer Sharing for Microsoft Networks" > OK.
· Reboot.
· If you need file or printer sharing, repeat the above, re-check the box and re-boot
again.
Easy Way to Adjust LargeSystemCache
Normally, the tweak I've seen asks you to go into
HKLM\System\CurrentControlSet\Control\Session Manager\Memory Management and change the
value to either O or 1 to the adjustment the LargeSystemCache.
However, in Windows XP, all you have to do is:
· Right-click My Computer.
· Select Properties.
· Click Advanced.
· Choose Performance.
· Click Advanced again.
· Select either Programs or System Cache under Memory Usage.
Programs = 0 for the registry tweak equivalent
System Cache = 1 for the registry tweak equivalent
· On NT Server (in this case XP), the Large System Cache option is enabled, but
disabled on Workstation. The two different settings effect how the cache manager
allocates free memory. If the Large Cache option is on, the manager marks all the free
memory, which isn't being used by the system and/or applications, as freely available for
disk caching.
· On the flip-side (with a small cache), the manager instead only sets aside 4MB of
memory for disk caching in an attempt to accelerate the launch of applications. Or in a
more technical approach, if enabled the system will favor system-cache working sets over
process working sets (with a working set basically being the memory used by components of
a process).

Wednesday, July 20, 2011

How To Disable Facebook’s New Chat

Anyone here got pissed of Facebook’s New Chat? Of course everyone.. even me. This new Facebook chat way is awful since it doesn’t show all your friends and takes a lot of space from your screen. Most of our Facebook readers wants to get rid of this new chat way on Facebook so we’re here to deliver a very simple way to do that.

No, it’s not about “Hide Sidebar”, we’re not silly. We’ve got 2 scripts for Mozilla Firefox and Chrome users to allow you to disable Facebook’s new chat with just few clicks on your mouse.

Mozilla Firefox users: First install this add-on followed by installing this script to get back your old Facebook chat. Just give your browser a fast restart after installing the script.

Chrome users: You don’t need an add-on. Just install this script and restart your browser to view changes.

Didn’t get it? Take this! You can also try using this link to use Facebook’s popout chat. 

Got your solution?

Mac OS X Lion's Arrives Tomorrow

Hot on the heels of Apple’s stellar earnings release comes some more big news: the next version of its Mac operating system, OS X Lion, is coming tomorrow. The announcement was made (rather nonchalantly) by Apple CFO Peter Oppenheimer during the earnings call, which is currently ongoing (you can find our notes from the call here.
53c39c3a-46d2-4dab-8522-896681588b25_400-1
Lion’s imminent arrival doesn’t come as a surprise — Apple had previously announced that it was coming in July, and many of the rumor sites pegged the launch date as Wednesday (there are also many rumors that the OS will be launching alongside updated Macbook Airs and Mac Minis, and possibly displays updated with Thunderbolt support).

Lion is shipping with a low, $29 price-tag — thought it isn’t technically shipping, at least as far as physical boxes are concerned. Instead, Apple will be distributing the update as a download via the Mac App Store, weighing in at around 4 gigabytes.

Monday, July 18, 2011

SMS Backup: An Android App. to Backup your Text Messages on Your Gmail Account

sms backup to Gmail

If your mobile phone has limited capacity for storing SMS text messages or if you are looking to delete all the old text conversations from the phone but still preserve them somewhere, here’s something for you to consider.

SMS Backup, as the name suggests, is a free app for Android mobile phones that can copy all SMS messages from the phone to your Gmail account with a click. It can save both your incoming and outgoing messages to Gmail.

To get started, first enable IMAP in your Gmail account available under Gmail Settings –> Forwarding and POP/IMAP –> Enable IMAP. Next launch the SMS backup app on your phone, enter your Google account credentials and the will immediately copy all existing text messages to a new folder /label in your Gmail account.
 
The best part is that as new text messages arrive, or you send one, the app will automatically save them to Gmail in the background without you having to do anything.

Get Avast Internet Security One Year License For Free

Like many other security software companies, Avast is offering both a free basic version of their software and a commercial advanced version that comes with extra features. Avast Internet Security is the companies’ flag ship product that includes all the features of the free and pro versions of their product plus a firewall, antispam protection or identity theft protection.

The German computer magazine COM is currently running a giveaway of avast! Internet Security. The promotional web page is accessible by anyone. While only in German, it provides a license that works with English versions of Avast Internet Security as well.

Here is how you can get your free license of Avast Internet Security. Start by downloading the latest version of the security program from the official website. The link points to the English version of the software. I have not tested other language versions, they may work as well.

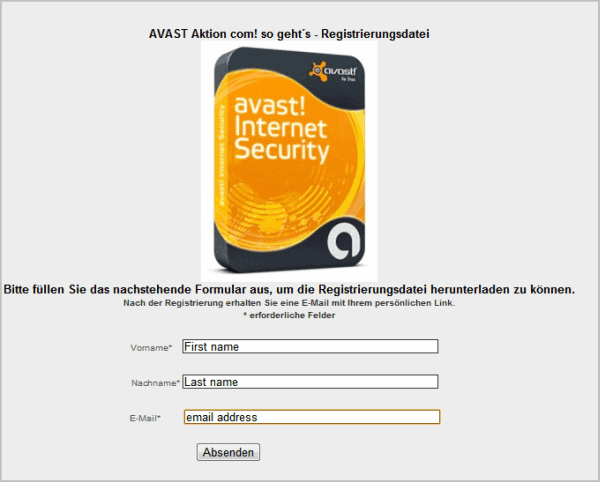
Go to the promo page and fill in your first name, last name and email address. You will receive a license download link in an email once you click on the send (Absenden) button.

avast internet security license

The license file is zipped which means you need to unzip it first. Make sure you have Avast installed before you click on the License com! so geht´s.avastlic file. A click on the file registers the program. You can alternatively open Avast Internet Security and load the license under Registration Options from within the program interface.

The license itself expires April 2012, which means you get about nine months of free use from this marketing opportunity.

You can post your suggestions and reviews about this post in comments....!!

Sunday, July 17, 2011

Windows 7 Keys............For activate.......

Use the below keys to activate your windows 7

482XP-6J9WR-4JXT3-VBPP6-FQF4M

7XRCQ-RPY28-YY9P8-R6HD8-84GH3

D9RHV-JG8XC-C77H2-3YF6D-RYRJ9

JYDV8-H8VXG-74RPT-6BJPB-X42V4

RFFTV-J6K7W-MHBQJ-XYMMJ-Q8DCH

Hack connected Computers in WIFI.........

The internet is ever growing and you and I are truly pebbles in a vast ocean of information. They say what you don’t know can’t hurt you. When it comes to the Internet believe quite the opposite. On the Internet there a millions and millions of computer users logging on and off on a daily basis. Information is transferred from one point to another in a heartbeat. Amongst those millions upon millions of users, there’s you.

In this tutorial i am going to show you how to to access someone’s facebook, youtube, and many other accounts which is using the same WiFi as you.

You need:
Mozilla Firefox
Firesheep – A Firefox extension that demonstrates HTTP session hijacking attacks.
WinPcap – WinPcap is an open source library for packet capture and network analysis for the Win32 platforms. It includes a kernel-level packet filter, a low-level dynamic link library (packet.dll), and a high-level and system-independent library.

Step 1: Install WinPcap then drag the Firesheep add-on, and put it on the Firefox icon. Firefox will open and will ask you to install the add on. Install it and restart Firefox.

Step 2: Open the add-on (You can do it by clicking on View ->Sidebar -> Firesheep), then click on Start Capturing and it’ll start capturing, and as soon as somebody logs in any account it’ll show up the logs, and then you can access their account.

Simple, but functional and VERY effective method to hack someones facebook, youtube, myspace, etc. account through WiFi.

Friday, July 15, 2011

Unlock your mobile Free from code

If your mobile phone is locked to particular sevice provider you can unlock it by entering the code you will get from the websites listed below.
If you know any other good site offering free downloads you can suggest that in comments and if found good it will be updated to our blog with your name as referal.

1.Unlock Nokia

This site offers nokia phone unlocking in three simple steps.
unlock nokia visitors review: 4.5/10


2.Free Unlock mobile


This site offers free phone unlocking for more than 500 service providers worldwide.
The site offers a simple, user-friendly interface.
free unlock mobile visitors review: 3.5/10
3.Free Unlock mobile

At this popular site, you'll find thousands of free downloads for your mobile phone,
including ringtones, tutorials, unlocking software, logos, wallpapers, themes, phone applications, phone games, and much more.

free unlock mobile visitors review: 3.5/10

This site offers a free "unlock codes generator" that you can use to unlock your phone.
(which will enable you to use your phone with any service provider worldwide).
free unlock mobile visitors review: 3/10

This is one more site offering unlock service for mobile.
free unlock mobile visitors review: 1/10

How To Remotely Control Your Computer from an iPhone or iPod Touch

Being able to remotely control your computer is cool and convenient. Today we take a look at how to do it from your iPhone or iPod Touch with Splashtop Remote Touchpad.


1. First download the Splashtop Remote Touchpad from your iOS device or from the App Store in iTunes.
sshot-2011-04-25-[00-25-21]
2. After you download it, launch Touchpad from the home screen.
sshot-2011-04-25-[00-25-55]
3. The first time you start it up, you’re prompted to provide anonymous usage stats or not. The choice is yours – this will be the last time you see this message.
sshot-2011-04-25-[00-26-16]
4. Then you will see the instructions on the lower section of the screen. Notice that to begin, you’ll need to download the Splashtop Remote desktop app.
sshot-2011-04-25-[00-26-43]
5. Now you’ll need to visit the Splashtop Remote website and download the Remote Streamer for your Mac or PC.
sshot-2011-04-25-[00-13-19]
6. After its downloaded right-click the executable file and Run as administrator. Installation is basic – just accept the defaults in the install wizard.
sshot-2011-04-25-[00-27-50]
7. Launch Splashtop Remote and go through the setup process.
sshot-2011-04-25-[00-31-29]
8. After you go through the four initial setup steps, you can configure the Remote Streamer just like you would do for Splashtop Remote Desktop. From here you can turn it on or off, configure Settings, Security, and Network.
sshot-2011-04-25-[00-33-29]
sshot-2011-04-25-[00-34-03]
9. When you minimize the Remote Streamer, you’ll get the following message letting you know it’s still running in the background.
sshot-2011-04-25-[00-34-17]
10. The Splashtop Remote icon lives in the Notification Area on the Taskbar.
sshot-2011-04-25-[00-39-03]
11. Now that you have the Remote Streamer installed, setup, and Running go to you iPhone or iPod Touch and start using the Remote app. It will scan your system for computers on your network that have the Remote Streamer installed and list them. Just tap on the one you want to access.
sshot-2011-04-25-[02-13-35]
12. Then you’ll be prompted to enter in the password you created in the earlier steps.
sshot-2011-04-25-[02-14-02]
13. Then you can use it just like a touchpad on a laptop to move the cursor around, right and left click, double tap an application to install it…etc..
sshot-2011-04-25-[02-14-27]
14. Tap on the icon in the upper left corner of the touchpad screen to bring up the keyboard features.
sshot-2011-04-25-[02-15-52]
15. Now you have more controls to type in text, access the Windows key, arrows, and more.
sshot-2011-04-25-[02-16-18]
16. Tap on the icon in the upper left corner again to return to the touchpad.
sshot-2011-04-25-[02-16-42]
17. You can choose different settings for the touchpad button including tweaking the sensitivity to how you like it.
sshot-2011-04-25-[02-18-56]
18. This is a great solution if you have an HTPC or want to kick back in your office chair and watch media on on Windows Media Center or iTunes.
sshot-2011-04-25-[02-04-52]
sshot-2011-04-25-[02-08-50]
The Splashtop Remote Touchpad is very responsive and easy to use. Of course you’ll need to use it over a local Wi-Fi network. If you have an iPhone or iPod Touch and want an easy to use remote control for your computer, this app definitely gets the job done.
They also offer an iPad version for $2.99 if you want to use that instead and remember it works for Mac’s as well.

[Via Simplehelp.net]

Recover Your Deleted Photos.....

Sometimes by mistake we delete photos from our digital cameras , memory cards , flash memory and from our hard disks too . So now when you make such mistake again then you can try Easy Digital Photo Recovery software to recover your photos from cards and hard disks too .

How this works : In this software all we have to do is select the disk space from where you deleted your images and then recovery software will try to undelete all those process and recover all erased photos from your camera cards additional drives as well as from hard disk . This software supports NTFS, FAT16 and FAT32 file systems and even find images whose location and size is not stored by the file structures .

Other features are like we can take preview of images before recovery and recover almost all type of image files like jpeg , png , gif etc . Most of the branded digital cameras are supported like Canon, Nikon, Olympus, Sony, Samsung, Epson, Fuji, etc . All recovered files can be filtered as names and size and named folder are supported too . Files can also be recovered if photos have been deleted in DOS prompt also . You can download this software from here.

Download software

Thursday, July 14, 2011

How To Speed Up Menus in Windows 7

The new user interface in Windows 7 elegant and smoother to navigate versus XP. However, there are tweaks you can do to make it even better. Here we’ll look at how to speed up the menus by tweaking the Registry.

This tutorial will show you how to make tweaks to the Registry in Windows. Before making any changes, it’s a best practice to back it up first.
1. Click on Start and type regedit into the Search box. At the top you’ll see regedit.exe, right-click on it and click Run as Administrator.
sshot-2011-05-13-[22-40-36]
2. The Registry editor will open. In the left pane navigate to the following:
HKEY_CURRENT_USER\Control Panel\Desktop
Then in the right panel scroll down to MenuShowDelay and double click on it.
sshot-2011-05-13-[22-49-14]
3. You should see the default Value Data is set to 400. Change this to a smaller number or you can even go with zero if you want menus to come up instantly.
sshot-2011-05-13-[22-50-00]
4. After setting the Value Data click OK.
sshot-2011-05-13-[23-02-17]
5. Now when you look under the data column for MenuShowDelay is set to zero or whatever you set it to.
sshot-2011-05-13-[23-04-18]
6. Close out of the Registry and click on the Start Menu – you should notice it opening up much faster than before.
sshot-2011-05-13-[23-07-52]
That’s all there is to it! This is just a small way to help speed up the user experience on your Windows 7 system.

[Via Simplehelp.net]

Wednesday, July 13, 2011

Link to a Specific Spot in a YouTube Video

A lot of times you want to show you friends a cool video, the cool part doesn’t happen later in the timeline. You can tell them the action takes place at the 2:03 mark for example, but wouldn’t it be more cool to just link to that spot? Here is how to do it.


1. Go to YouTube and sign in with your Google account.
sshot-2011-06-04-[06-58-58]
2. Start watching videos, and when you find something cool you want to share right-click on the timeline at the point where you want to start sharing the video.
sshot-2011-06-04-[07-03-35]
3. Then click on Copy Video URL at Current Time.
sshot-2011-06-04-[06-58-04]
4. Now you an share the URL via IM or email and when the user clicks the link they go to the point in the YouTube video you selected.
sshot-2011-06-04-[07-15-49]
That’s it! This is a cool trick so if a funny part or cool part of a video doesn’t start until well over 2 minutes into the clip – you can link to just a few second before it.

Do Posting To Facebook From Google+ Account

This tutorial will walk you through the steps required to view your Facebook stream right from within Google+


For this feature to work, you’ll need to use either Google Chrome or Firefox as your web browser – though it doesn’t matter if you’re using Windows or OS X.
  1. The installation will be slightly different depending on which browser you’re using. I’ll outline both. If you’re using Firefox, skip down to step #6 below. If you’re using Chrome, keep reading.
  2. Start out by heading to this web site (link will open in a new window or tab). Click the Get Google+Facebook >> button.
  3. The ‘warning’ message will appear in the Extensions bar at the bottom of your browser. Click the Continue button.
  4. Click the Install button when prompted.
  5. Now that you’ve installed the Extension in Chrome, jump down to step #9 get it up and running.
  6. Firefox users – head over to this web site (link will open in a new window or tab). Click the Get Google+Facebook >> button. A ‘warning’ window will quickly pop up telling you that Firefox blocked the installation of the add-on. Click the Allow button in that ‘warning’ window (see image below).
  7. Now Firefox will prompt you to install the add-on. Click the Install Now button.
  8. Finally, click the Restart Now button to finish the installation.
  9. Head over to Google+ and sign in. You’ll now see a “Facebook” button in the navigation section (see image below). Click it.
  10. Click the Connect with Facebook button.
  11. Click the Allow button when prompted by Facebook.
  12. Now once you click that same “Facebook” button in your Google+ navigation section, your Facebook News feed will be displayed!
  13. You can even update your Facebook Status from within Google+ now. Click the What’s on your mind? box at the top of the page.
  14. Enter your status update and then click the Share button …
  15. … and your update will appear on Facebook.
  16. There are still some limitations to the features that this Extension/Add-On adds – for example, you can’t include image or other attachments to your Status Updates. Also, you can’t see or reply to any comments on your friends posts. You can click the link below their update, and be taken to it directly on Facebook itself, however. Have fun! 

Keep Surfing Borntohack (Shaify Mehta : Hacker , Programmer , Cracker)

Tuesday, July 12, 2011

jailbreak all iDevices in a simple way : Jailbreakme.com

Jailbreakme.com has become the easiest way to Jailbreak all idevices and all firmware till iOS 4.3.3.

Here are the steps what u have to do :-

Step 1: Open Safari in your iDevice.

Step 2: Navigate to www.Jailbreakme.com

Step 3: Tap on the free button and it changes to a green install button.


Step 4: Now tap once on that green button.
           Caution : Sometimes the green button goes back to free button and   
                          nothing happens. Donot worry just the steps from step 3 and     
                          carry on.....


Step 5: Reboot device and cydia will be installed and enjoy ur jailbroken device (: